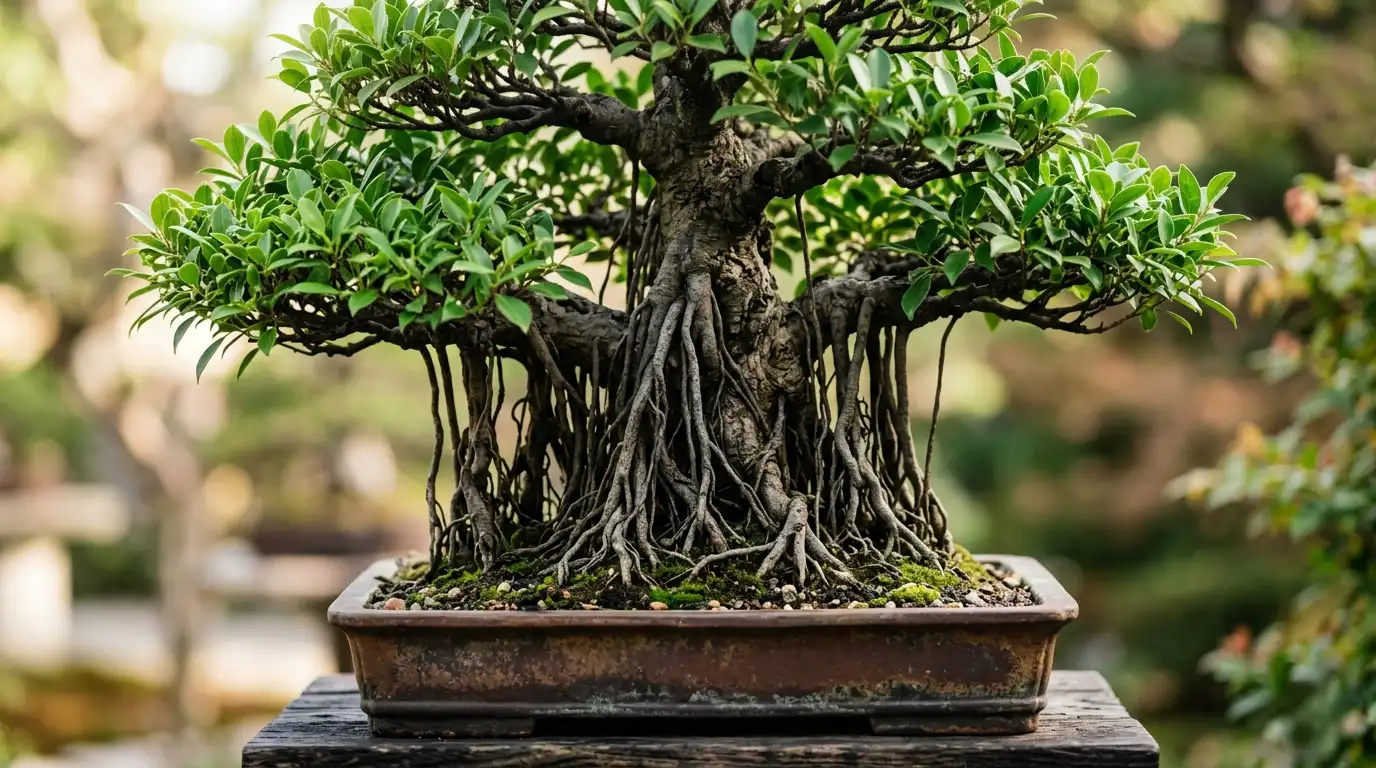
Have you ever walked past a massive banyan tree and just stopped dead in your tracks? Those thick, rope-like tendrils descending from the branches, eventually plunging into the soil like a troupe of acrobats — there’s something almost mythological about them.
Now imagine shrinking that entire spectacle into a pot that fits on your windowsill. That’s exactly what aerial root styling on a Ficus retusa bonsai lets you do.
Aerial roots transform an ordinary bonsai into something that looks ancient, otherworldly, and alive in a way most trees simply aren’t. But they’re not magic — they’re biology. And once you understand how to encourage, guide, and shape them, you unlock one of the most rewarding skills in the entire art of bonsai.
Designed for both novices and veteran artists aiming to refine their skills, this definitive resource provides the ultimate blueprint for mastering the intricate styling of Ficus retusa aerial roots.
| Technique | Difficulty | Best Season | Time to Results | Key Tool |
| Encouraging New Aerial Roots | Beginner | Spring / Summer | 4–8 weeks | Misting bottle / humidity tent |
| Guiding & Training Roots | Intermediate | Spring | 2–6 months | Bonsai wire (1–2 mm) |
| Merging / Fusing Roots | Intermediate | Spring | 6–18 months | Grafting tape |
| Nebari Graft (Root on Trunk) | Advanced | Late spring | 1–2 years | Grafting knife, sealant |
| Removing Unwanted Aerial Roots | Beginner | Any (avoid winter) | Immediate | Clean pruning shears |
What Is Ficus Retusa and Why Bonsai Artists Love It
Ficus retusa — sometimes called the Taiwan fig or Cuban laurel — is arguably the world’s most popular indoor bonsai tree. And honestly? It deserves that title. This tropical fig species is forgiving with watering mistakes, tolerates low light better than most bonsai candidates, and responds enthusiastically to pruning and shaping.
But what really makes Ficus retusa the star of the show is its natural propensity for growing aerial roots. In its native humid environment across Southeast Asia and the Pacific Islands, mature specimens develop dense curtains of aerial roots that fuse with the trunk, creating dramatic banyan-like silhouettes. Bonsai artists have been leveraging this biological superpower for centuries — and you can too.
Think of Ficus retusa as the ultimate creative canvas. It’s like working in clay rather than marble: forgiving, responsive, and surprisingly resilient when you make a mistake.
Understanding Aerial Roots: Nature’s Engineering Marvel
Before we dive into the techniques, let’s take a moment to appreciate what aerial roots actually are — because understanding the ‘why’ makes the ‘how’ infinitely clearer.
How Aerial Roots Form Naturally
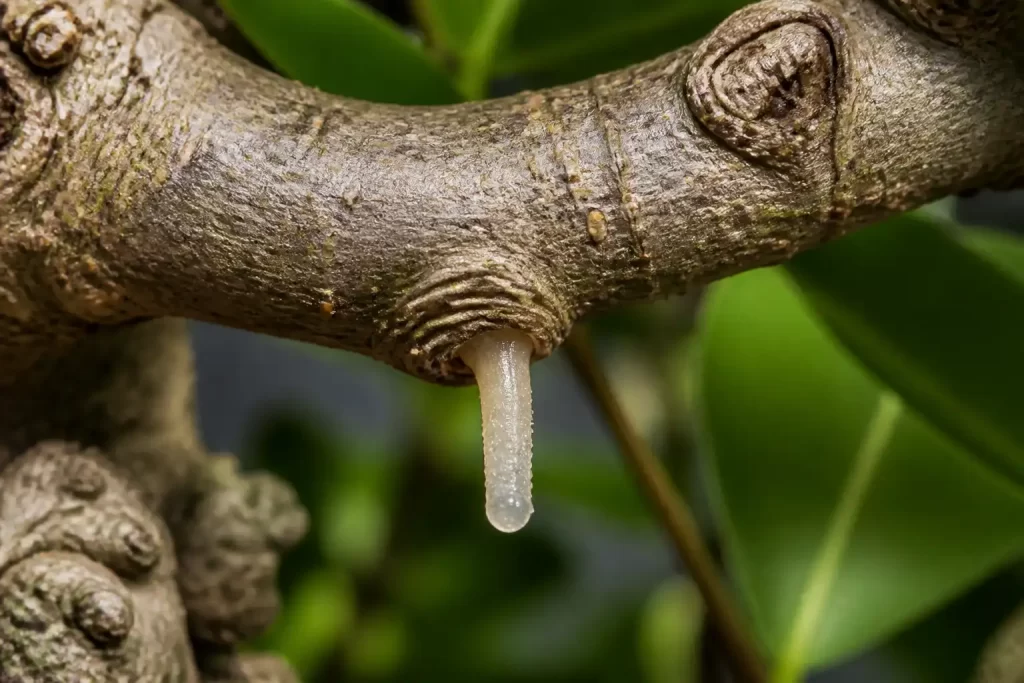
Aerial roots on Ficus retusa grow from the branches and lower trunk, not from the soil. They originate from meristematic cells (think of these as plant stem cells) that activate in response to high ambient humidity.
Once a root tip makes contact with the growing medium, it thickens, anchors, and eventually becomes a full structural pillar — just like a secondary trunk.
In nature, this process is triggered by the tropical monsoon cycle. During the wet season, humidity can exceed 90%, and trees literally drip roots like rain. Your job as a bonsai artist is to mimic those conditions in miniature.
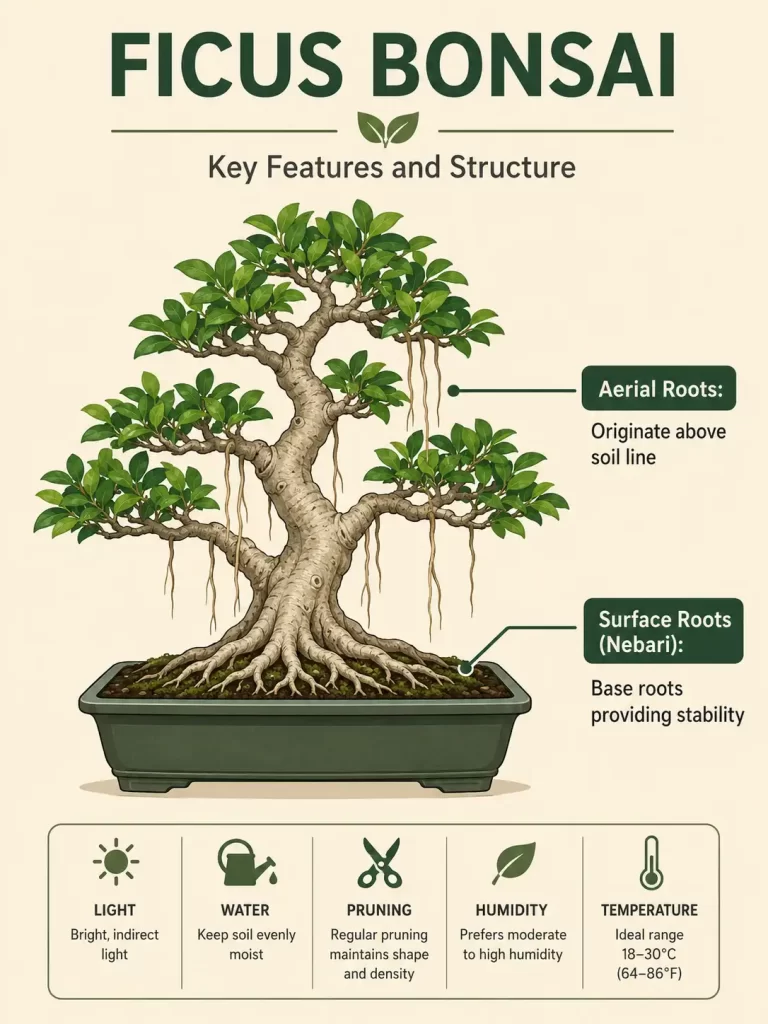
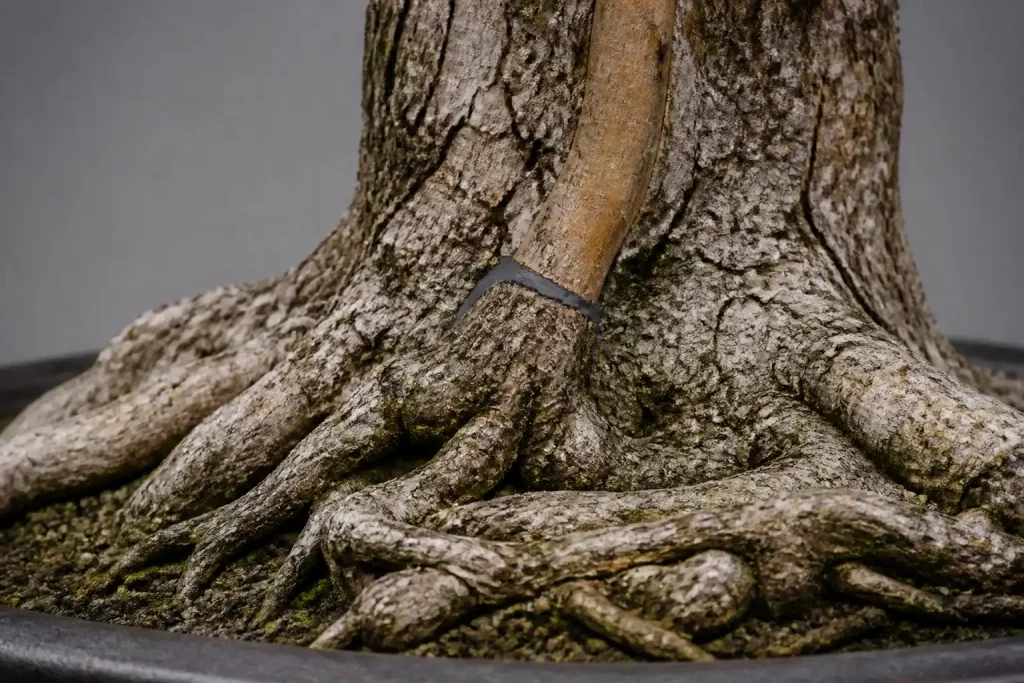
Aerial Roots vs. Surface Roots: Know the Difference
It’s easy to confuse aerial roots with surface roots (nebari), but they’re quite different. Nebari are the flared base roots visible at soil level, and they contribute to the tree’s sense of age and stability — like the legs of a sturdy chair.
Aerial roots, by contrast, originate above the soil line and descend through the air before (sometimes) reaching the substrate.
Both are valuable to a bonsai’s composition, but they serve different aesthetic and structural purposes. In this article, we’re focusing on aerial roots — those spectacular hanging or crawling tendrils that give Ficus retusa its signature banyan character.
Creating the Perfect Environment for Root Development
Here’s the truth: you can’t force aerial roots to grow on a dry windowsill in February. You can, however, create micro-conditions that make your tree think it’s in a Southeast Asian rainforest. It’s all about environmental manipulation.
Humidity: The Secret Ingredient
Aerial root development on Ficus retusa is almost entirely humidity-driven. Most indoor environments hover around 30–50% relative humidity — far too dry to trigger root emergence. Your target is 70–90% in the immediate vicinity of the tree.
How do you get there? A few proven methods: Place the pot on a humidity tray filled with pebbles and water (the evaporation creates a local microclimate). Use a small ultrasonic humidifier aimed at the canopy.
Build a temporary ‘humidity tent’ using a clear plastic bag or a purpose-built acrylic enclosure around the tree. Mist the trunk and branches twice daily with room-temperature water during the growing season.
Pro tip: don’t mist with cold water straight from the tap — the temperature shock can stress tropical species. Let it sit for a few hours first.
Light and Temperature Requirements
Ficus retusa needs bright, indirect light for at least six hours per day to fuel the growth that supports aerial root development. Direct midday sun through glass can scorch leaves, but a south- or east-facing window (in the northern hemisphere) is ideal.
Temperatures should stay between 18°C and 30°C (64–86°F). Anything below 12°C (54°F) will slow growth dramatically and suppress aerial root emergence entirely.
If you’re working in a cooler climate, a grow light positioned 20–30 cm above the canopy can extend your growing season significantly and keep root development active well into autumn.
Step-by-Step Aerial Root Styling Techniques
Alright — let’s get to the good stuff. Here are the four core techniques every Ficus retusa enthusiast should know, from the beginner-friendly to the genuinely advanced.
Technique 1 – Encouraging New Aerial Roots
This is where everyone starts, and it’s simpler than you might think. During the active growing season (spring through late summer), increase humidity around the canopy to at least 70%. Target the lower branches and upper trunk — this is where new roots are most likely to initiate.
A humidity tent is your best friend here. Drape a clear plastic bag loosely over the tree, leaving a small gap at the base for air circulation. Check daily for condensation, which indicates the humidity level is working.
Within four to eight weeks, you should see tiny white root nubs emerging from the bark. Resist the urge to touch them — they’re as delicate as spider silk at this stage.
Once roots reach about 5 cm in length, you can begin guiding them. Until then, patience is your most important tool.
Technique 2 – Guiding and Training Existing Roots
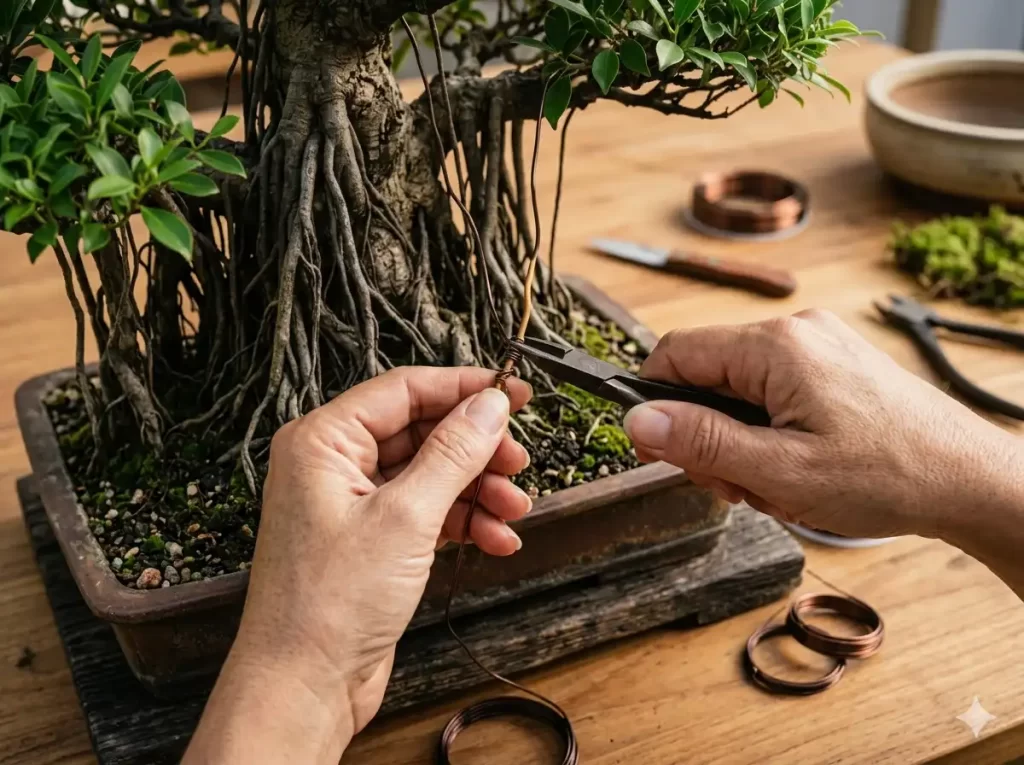
Think of young aerial roots like soft copper wire — they’re pliable and easily shaped before they harden. Using fine bonsai wire (1–2 mm gauge), you can coax roots to follow specific paths: spiraling around the trunk, descending in graceful curves, or clustering in groups for a dramatic, fused-pillar effect.
Wrap wire gently around the root without constricting it — these are living tissues, not dead wood. Check every two to three weeks and remove the wire before it bites into the root’s surface.
As the root touches the soil or growing medium, secure it lightly with a small stone or wire staple until it anchors itself naturally.
Technique 3 – Merging Roots for Dramatic Effect
Want that full banyan look? Merge multiple aerial roots into a single column. When two or more roots are young and pliable, gently bind them together with grafting tape or damp sphagnum moss, pressing their surfaces into contact.
Over the following months, the roots will naturally grow into each other — a process called inosculation — forming one thick, unified pillar.
This technique is particularly powerful when you use it to add visual mass to one side of the composition, creating asymmetry and a sense of windswept age. It’s like sculpting in slow motion.
Technique 4 – Grafting Aerial Roots onto the Nebari
This is the advanced move — not for the faint-hearted, but incredibly rewarding. By making a shallow cut in both the aerial root and the surface of the nebari or trunk, then binding the two together with grafting sealant and tape, you can intentionally ‘plant’ aerial roots exactly where you want them.
This allows you to fill compositional gaps, thicken specific areas, and engineer a nebari that looks decades older than it actually is.
Healing typically takes one to two growing seasons. Keep the tree in high humidity and avoid disturbing the graft site. Success rate improves dramatically in spring when the vascular system is most active.
Common Mistakes to Avoid When Styling Aerial Roots
Every bonsai artist makes mistakes — that’s how we learn. But a few errors are particularly common with aerial root styling, and knowing about them in advance could save you months of wasted effort.
Over-misting the foliage without improving ambient humidity is mistake number one. Wet leaves don’t equal high humidity — you need sustained atmospheric moisture, not just surface dampness.
Leaving wire on too long is another classic blunder; aerial roots can engulf wire surprisingly fast during the growing season, leaving unsightly scars that take years to disappear.
Never pull a rooted aerial root away from the trunk or pot — they can snap, and the wound site is an open door for fungal infection.
Finally, attempting aerial root styling in winter, when the tree is in a growth lull, is like trying to sculpt frozen clay. Time your interventions for spring or early summer.
Seasonal Timing: When to Style Your Aerial Roots
Timing is everything in bonsai, and aerial root work is no exception. The sweet spot is late spring through early summer, when temperatures are warming, daylight hours are lengthening, and your Ficus retusa is pushing strong new growth. The tree’s vascular system is running at full capacity — think of it as being in high-performance mode.
Summer is acceptable for training and guiding existing roots. Autumn work should be limited to removing unwanted roots before the tree begins to slow for winter.
Avoid any major interventions from late November through February if you’re in a temperate climate, as the stress combined with reduced metabolic activity can lead to root loss or dieback.
Tools You Need for the Job
You don’t need an enormous toolkit, but having the right equipment makes a real difference. Here’s what I recommend having on hand:
- A fine-nozzle misting bottle for targeted humidity application; bonsai wire in 1 mm and 2 mm gauges for root training; grafting tape and sealant for fusion and graft work;
- Sphagnum moss (kept damp) for wrapping root bundles;
- Clean, sharp pruning shears for removing unwanted roots; and
- A small hygrometer to actually measure humidity rather than guess.
That last item is surprisingly underrated — so many growers estimate humidity and miss the mark completely.
Aesthetic Philosophies: Banyan Style vs. Formal Upright
Aerial root styling doesn’t exist in a vacuum — it’s part of a larger design vision. The two most popular approaches for Ficus retusa with prominent aerial roots are the banyan style (netsunagari in Japanese, or often referred to as ‘exposed root’ style) and the modified formal upright (chokkan) with subtle root accents.
The banyan style celebrates chaos and abundance — dozens of roots cascading from a wide, spreading canopy, creating a miniature cathedral. It’s spectacular but demands patience and consistent humidity management.
The formal upright approach uses just two or three well-placed aerial roots as accents, adding a touch of tropical character without overwhelming the composition. For beginners, the latter is far more achievable and still breathtakingly beautiful.
Ask yourself: what story does this tree want to tell? A survivor clinging to a monsoon-battered cliff? Or a wise elder standing serene in a jungle clearing? Let that vision guide your styling decisions.
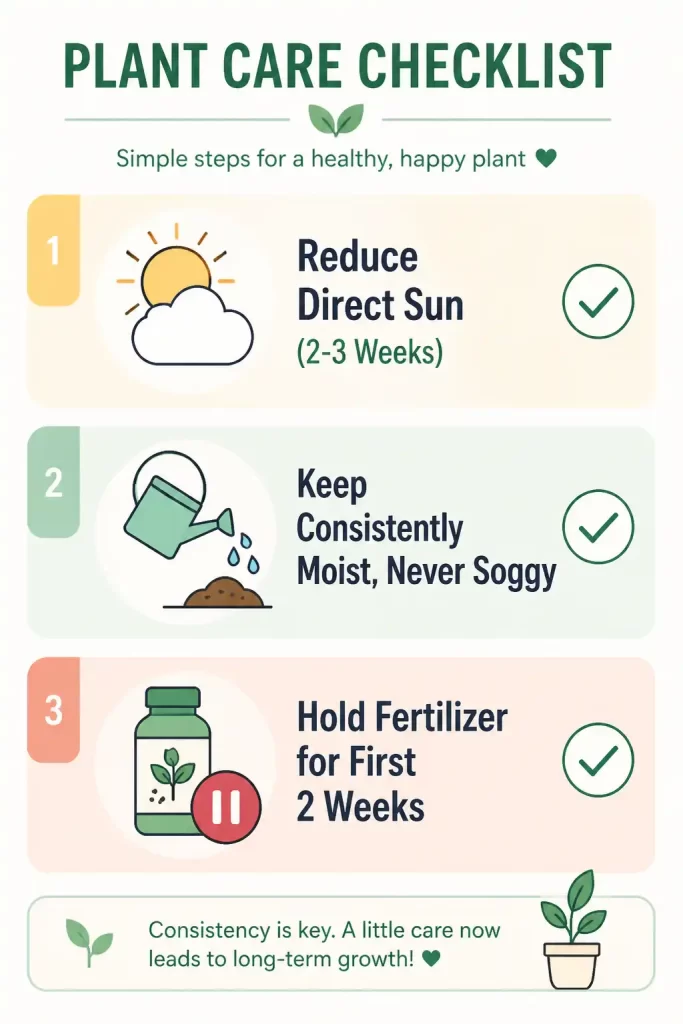
Caring for Your Ficus Retusa After Styling
Post-styling care is just as critical as the styling itself. After any significant root manipulation, move the tree to a warm, bright, and humid location and reduce direct sun exposure for two to three weeks. Keep watering consistent — Ficus retusa hates both drought and waterlogged roots, so aim for the substrate to be evenly moist but never soggy.
Feed with a balanced liquid fertilizer (10-10-10 or similar) every two weeks during the active growing season to support root development and recovery. Hold off on fertilizing for the first two weeks after any grafting work, as the tree needs to direct energy toward healing rather than new growth.
Monitor for pests, particularly scale insects and spider mites, which become more prevalent when trees are under stress. A weekly inspection of the undersides of leaves will catch most infestations before they become serious.
Conclusion
Aerial root styling for Ficus retusa bonsai is one of those rare skills that sits right at the intersection of science, patience, and art. You’re not just growing a plant — you’re collaborating with it, coaxing it toward a vision that may take years to fully realize. And that’s precisely what makes it so deeply satisfying.
Start with the basics: build humidity, encourage the first tentative root nubs, and resist the urge to rush. As your confidence grows, layer in the more advanced techniques — fusion, grafting, deliberate compositional placement. Before long, you’ll have a living sculpture on your shelf that stops every visitor in their tracks, just like that banyan tree you once stared at in wonder.
The journey is long, the progress is slow, and the results are extraordinary. Isn’t that exactly why we fell in love with bonsai in the first place?
Frequently Asked Questions (FAQs)
How long does it take for Ficus retusa to grow aerial roots?
Under optimal conditions — humidity consistently above 70%, warm temperatures, and bright indirect light — you can expect to see the first aerial root nubs within four to eight weeks of starting humidity treatment in spring. However, developing roots long enough to reach the substrate and begin thickening into proper pillars typically takes one to two full growing seasons. Patience is genuinely non-negotiable here.
Can I grow aerial roots indoors?
Absolutely, and many enthusiasts do it successfully year-round. The key is compensating for the typically low humidity of indoor environments. A combination of a pebble humidity tray, daily misting, and a small humidifier aimed at the canopy can bring local humidity close to the tropical levels Ficus retusa needs. South- or east-facing windows with supplemental grow lighting make indoor aerial root development very achievable.
What should I do if aerial roots start growing in places I don’t want them?
Simply remove them — cleanly, with sharp, sterilized pruning shears — as early as possible. Young aerial roots are easy to remove with minimal scarring. If you allow them to grow unchecked and then cut them when thick, you may be left with a visible wound that takes considerable time to heal over. Monitor your tree regularly during the growing season and edit as you go.
Do aerial roots affect the health of the bonsai?
In most cases, aerial roots are a sign of a healthy, vigorous tree growing in appropriately humid conditions — so they’re a positive indicator rather than a concern. However, if a very large number of aerial roots develop simultaneously, they can place extra metabolic demand on the tree. Selective pruning to maintain only the most compositionally valuable roots is both aesthetically and horticulturally sound practice.
Can I speed up aerial root development with root-stimulating hormones?
Some growers apply diluted indole-3-butyric acid (IBA) rooting powder or liquid to the branch nodes where they want roots to initiate, and there is anecdotal evidence that this can accelerate the process. However, environmental conditions — humidity, temperature, and light — remain far more influential than any chemical treatment. Get your environment right first; rooting hormones are an optional enhancement, not a shortcut.